-
Step 1: Measure the noise before you read a single product page
-
Step 2: Derate the NRR before you believe it
-
Step 3: Test the stack, not the earmuff
-
Step 4: Know what a tactical vest actually is before you spec one
-
Step 5: Order a pilot batch and log the failures
-
Step 6: Verify the supplier's paperwork, not the discount code
-
Step 7: Set a replacement schedule before the first order ships
-
The four mistakes I still see on other people's orders
I'm the office administrator for a 280-person logistics and light manufacturing company. I handle roughly $180,000 a year in safety equipment across nine vendors, and I report to both operations and finance. I am not a safety engineer. If you've inherited PPE ordering and you're now staring at a catalog of earmuffs, hard hat lights, and gear you've never worn yourself, this checklist is for you.
Seven steps. Most take under an hour. Step 3 and Step 6 are the two people skip, and they're the two that come back to bite you — one as a failed audit, one as a rejected invoice.
Step 1: Measure the noise before you read a single product page
The question everyone asks is 'which Peltor has the highest NRR?' The question they should ask is 'what is the exposure level at each workstation?' Those are different numbers, and the gap between them is where you both over-order and under-order.
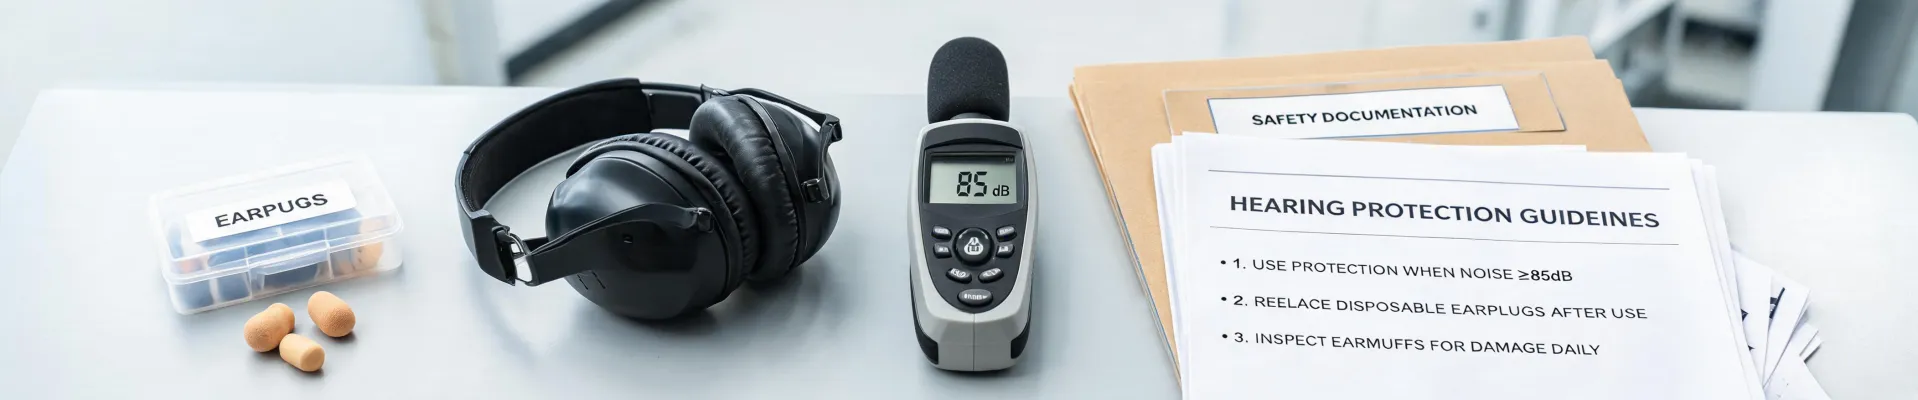
We run two shift profiles with very different noise: a mild area around 78 dBA and a stamping area that peaks near 98 dBA. One model does not serve both well. OSHA requires a hearing conservation program once the 8-hour time-weighted average reaches 85 dBA (29 CFR 1910.95). If you're anywhere near that line, you need readings, not a catalog guess.
What to actually do: borrow a Type 2 sound level meter for a day, or ask your safety consultant to walk the floor with you. Note peak levels as well as averages — impact noise is where people under-spec. Write the numbers on a floor map. This is the step that turns your purchase order from a guess into a specification.
Step 2: Derate the NRR before you believe it
Every hearing protector sold in the US carries a Noise Reduction Rating on the packaging, required under EPA regulation (40 CFR Part 211, Subpart B). That number comes from lab testing under ANSI S3.19-1974 — trained subjects, quiet room, careful fit. Your crew does not wear them like that.
So you derate. Per OSHA's Technical Manual (Section III, Chapter 5), A-weighted exposure estimates use (NRR − 7) ÷ 2. NIOSH guidance is blunter still: assume workers get roughly half the labeled attenuation.
Worked example, because this one got past me for two years. An NRR 30 earmuff becomes (30 − 7) ÷ 2 = 11.5 dB of assumed protection. Against 98 dBA exposure that puts you at roughly 86.5 dBA at the ear — still above the action level. That math is why doubling up with plugs under muffs exists, and why the cheapest compliant muff is not automatically the right one.
Honestly, I'm not sure why two suppliers quoted 40% apart on the same model number last year. My best guess is one was quoting a discontinued revision carrying an older NRR label while the other was current stock. Now I confirm the revision letter before I compare any pricing.
Step 3: Test the stack, not the earmuff
Most buyers focus on the NRR number and completely miss the fact that the earmuff has to seal against a head that is also wearing safety glasses, under a hard hat, with a headlamp strap running across the shell.
The checkpoints I use before any bulk order:
- Put the exact safety glasses you issue on a test subject, then fit the muffs. Temple arms sliding under the cushion is the classic seal-breaker.
- Mount the hard hat light on the shell first, then put the muffs on. Some lamp brackets sit exactly where the headband needs to travel.
- Confirm the hard hat is rated to ANSI/ISEA Z89.1-2014, and read the marking: Type I is top impact only, Type II includes lateral impact, and the class (G, E, or C) tells you the electrical rating. 'It's a hard hat' is not a specification.
- If a crew wears bump caps instead of full shells, verify that an earmuff adapter exists for that specific model. Adapters are model-specific, not universal, and the catalog page rarely says so.
We learned this one expensively in 2022. Ordered 90 sets of muffs and 90 hard hat lights together. The lamp bracket pushed the headband up about 3mm, which was enough that crews stopped wearing the muffs and just turned the music up instead. We ended up buying a different bracket. Not a large line item, but it cost us a month of poor protection that looked, on paper, like a completed rollout.
Step 4: Know what a tactical vest actually is before you spec one
When someone on the team asks 'what is a tactical vest,' the honest answer is: a load-bearing garment with MOLLE webbing and pouches, built to carry equipment. It is not inherently ballistic. A plate carrier is a separate category, and armor is rated under NIJ Standard 0101.06 — a standard a vest either meets, with test documentation, or it doesn't.
Practically, that means three different purchase categories that people say in the same breath: duty or load-bearing vests (webbing, pouches, hydration), plate carriers (cut for armor plates), and soft armor vests (concealable, different construction entirely). Putting the wrong words on a PO is how you end up receiving something nobody can legally deploy.
Granted, most field crews don't need any of the three. We only buy in this category for event and site-security contractors, which is maybe 4% of our PPE spend. But that 4% is where the compliance mistakes live, because it's the only category where a description mismatch can turn into an insurance problem.
Step 5: Order a pilot batch and log the failures
Fifteen units, two weeks, then count what comes back. This is the step where forum research earns its keep — but only if you use it correctly.
If you've read the Peltor Tactical Sport review threads on shooting and range forums, you'll notice the same themes repeat across hundreds of posts: how the headset behaves under a helmet, whether the battery actually lasts a full shift with Bluetooth running, and how the cups feel after six hours in heat. I treat those threads as a list of things to test, not a verdict. A review written by someone who wore it for two hours on a range day tells you very little about a 10-hour warehouse shift.
What I log during the pilot: return rate, complaints by category (fit, seal, heat, battery), and any failure that happened within 30 days. Three or more returns out of fifteen and I don't scale the order — I go back to Step 3.
Step 6: Verify the supplier's paperwork, not the discount code
Back in 2021 I found a great price from a new vendor — 22% cheaper than our regular supplier. Ordered 40 units. They couldn't provide a proper invoice (handwritten receipt only). Finance rejected the expense report and I ate $1,600 out of the department budget. Now I verify invoicing capability before placing any order.
Which brings me to discount codes. I get marketing emails constantly. A Brunt workwear discount code landed in my inbox last quarter and it was a genuinely good deal — their boots are solid. I still didn't buy through it. Not because the product is bad, but because our finance team needs a PO number, a tax-exempt certificate on file, and a line-item invoice for the asset register. A consumer checkout page produces none of those.
To be fair, if you're a one-person operation buying your own gear, a discount code is exactly the right move. The rule changes once someone else's accounting system has to absorb the purchase.
Minimum documentation from any new PPE vendor:
- W-9 and certificate of insurance
- Tax exemption documentation, if applicable
- Ability to invoice against a PO number
- Written confirmation of exact model number and revision
Step 7: Set a replacement schedule before the first order ships
The most frustrating part of this job: earmuff cushions degrade and nobody tells you. You'd think a $400 headset would ship with a maintenance reminder, but the cushions slowly stop sealing and the crew keeps wearing them because they 'still work.'
Replacement intervals vary by line — hygiene kits, foam inserts, and cushion designs differ across the Peltor range — so pull the manual for each specific model rather than assuming one schedule covers the fleet. Put the replacement date on the purchase record at the time of ordering, not six months later when someone asks why the compliance file has a gap.
Same logic for hard hat shells: check the manufacture date stamped inside the shell, not the purchase date on your invoice. Those are usually not the same.
The four mistakes I still see on other people's orders
- Buying on NRR alone. The number on the box is a lab result, not a field result.
- Assuming the lamp bracket is universal. It isn't, and it's the cheapest failure to prevent.
- Writing 'body armor' on a PO for a load-bearing vest. Different product, different standard, different liability.
- Letting a discount code route around the PO system. The savings are real; the accounting problem is also real.
One last thing, and this is the part I've come to believe most firmly after five years of doing this: the equipment you hand someone is a message about how seriously the company takes their safety. Crews notice when the muffs are the cheap ones that don't seal with the glasses they were issued. So do the clients who walk the floor during a site visit. Saving $12 a unit on a headset that gets worn eight hours a day is not where I look for savings anymore.

Rodrigo Salazar
Rodrigo Salazar is a fall-protection analyst specializing in full-body harnesses, energy-absorbing lanyards, self-retracting lifelines, anchorage connectors, rope grabs, horizontal lifelines, and rescue kits. He applies ANSI Z359.11, ANSI Z359.14, EN 361, and EN 360 while evaluating arrest force, clearance, free-fall distance, deceleration distance, gate strength, connector compatibility, user capacity, leading-edge performance, inspection criteria, and rescue time. His guides help construction managers, tower crews, utilities, engineers, and buyers design complete systems around anchor location, mobility, swing-fall exposure, equipment compatibility, inspection burden, and post-arrest recovery.